In every corner of the world that I’ve explored, I’ve found garbage or junk of some sort. Even in places I was sure were considered “pristine wilderness,” there was trash. Finding junk worthy of survival is a practice all its own, but finding it is just the beginning. At the same time, common everyday items can often be turned into survival gear by using a little ingenuity.
Table of Contents
POCKET SHOT
For sale online and in some sporting goods stores for about $25, the Pocket Shot is a modern version of the slingshot (AGAINST ALL ODDS: The Slingshot Redefined, October 2016 S.W.A.T.). It shoots marshmallows, rocks, ball bearings, skewers as arrows, and regular arrows. Really, whatever you can fit in there, it will shoot.
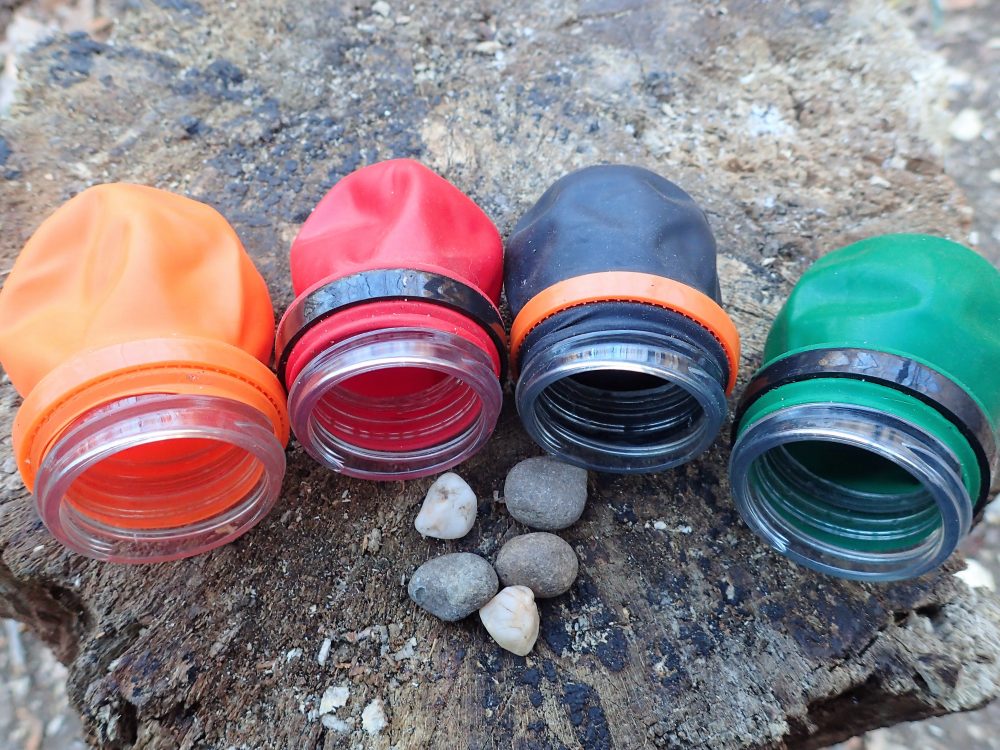
You can make your own for about $1. Start with a wide-mouthed plastic drink container like some water and sport-drink bottles. Using a small saw or sharp knife, cut the body of the bottle off just below the mouth. Remove the colored plastic ring without cutting it.
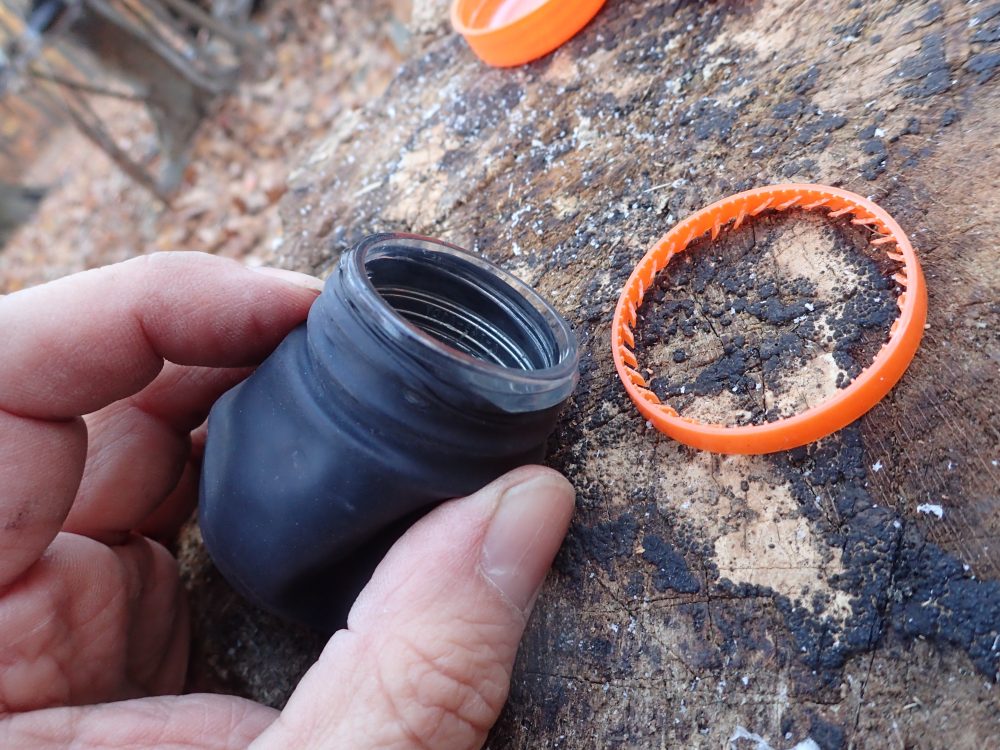
Take a rubber balloon (found at most dollar stores and party supply stores) and cut the neck, right where the balloon gets wide.
Starting where the cut was made, stretch the balloon over the mouth of the plastic bottle, then stretch the balloon up to the threads of the mouth. Even the balloon out and put the plastic ring back on the mouth, over the balloon. Tidy it up by rolling the rubber back down, toward the plastic ring. The homemade Pocket Shot is ready to use.
Keep the bottle lid to store small rocks or ball bearings (ammo) in the Pocket Shot. It’s easy to make, but be aware of safety, mainly ricochet.
ZIP TIES
Zip ties are one of the most underrated household “survival” items. They have a long list of uses, including hog-tying game for carrying; quick lashing of shelter poles; lashing gear to holsters, sheaths, or webbing; or just rigging up cords around the house. They are more reliable than ranger bands (inner-tube rubber) because they do not melt as easily or become brittle in the sun like ranger bands. They hold strong and yet are easy to remove with a knife or scissors.
Zip ties are sold at most dollar stores, and in a variety of thicknesses and lengths. I have found them useful when putting together small tables and making chairs for a survival-style camp.
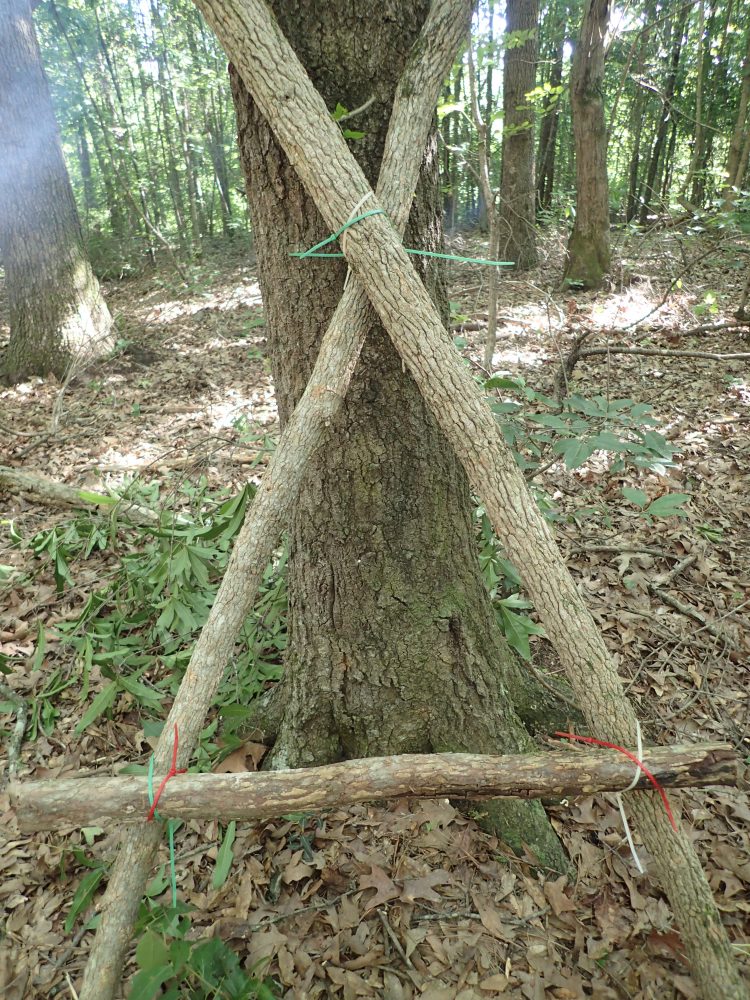
Last summer, I brought a pack of zip ties on a camping trip in Georgia and couldn’t believe how strong they were for holding weight. I made a table and a large camp chair, based off a tripod, using zip ties to hold the parts together. It really made for a fast set-up.
Rather than lashing with cordage, a few zip ties do just as well and last a long time. They can be used to hold the initial framework up for most structures. Zip ties are a strong, fast way of erecting camp shelter poles, tables, and chairs, or hanging or lashing anything around the camp or house.
TIN-CAN TRIPOD
One easy way to make a tripod without using cordage and having to tediously do all the frapping is to use a junk tin can instead of lashing. All the same rules apply for the tripod like using pieces of wood as close to the same length and thickness as possible. By simply removing the top or bottom with a can opener found on a multi-tool or Swiss Army Knife, the work is almost done.
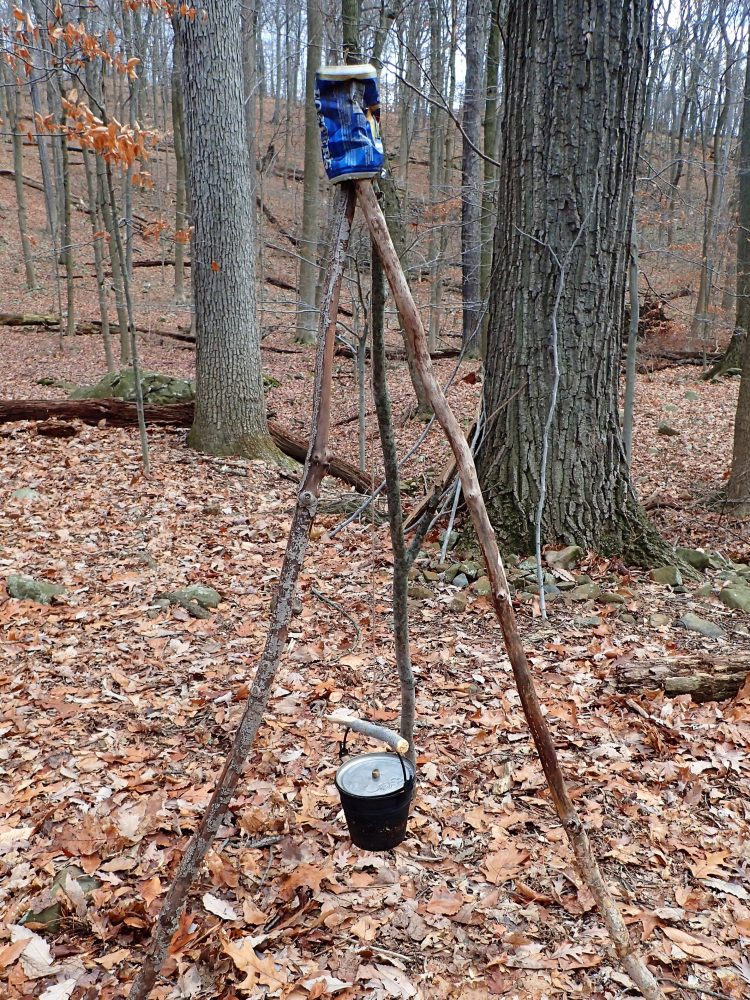
Naturally, thinner sticks are easier because they will fit in the can, but not any thinner than a broomstick. This is mainly for hanging a kettle or small to medium metal pot for boiling over an open fire.
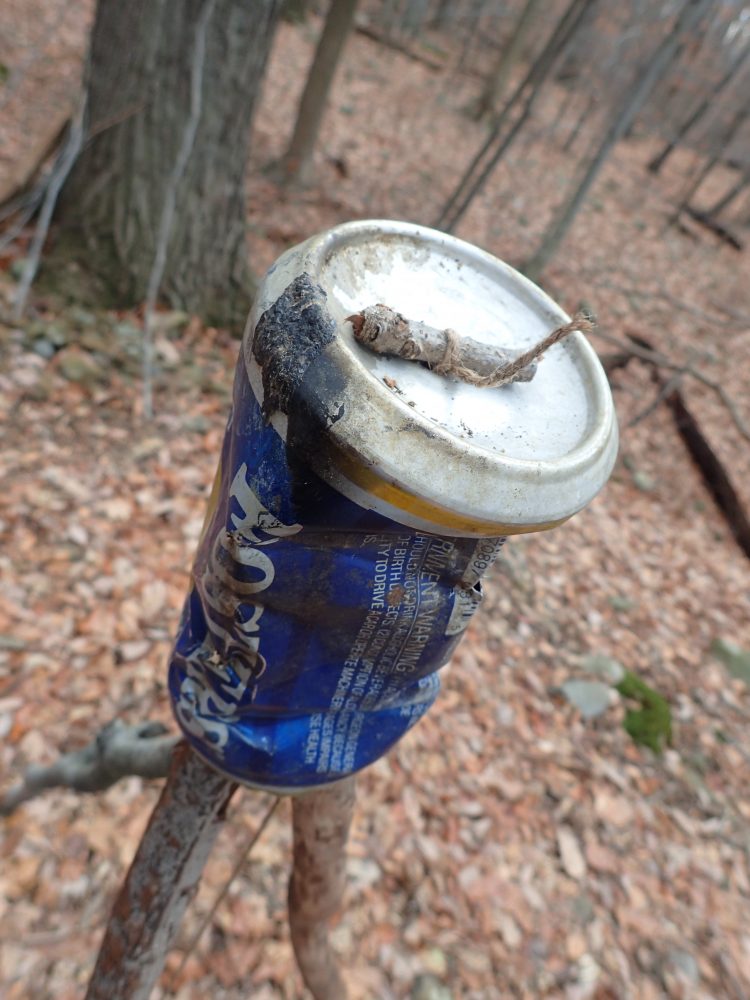
Use an awl or knife (if no other suitable tool is available) to bore a hole in the other end of the can. I remove the top because it is easier to get off with a Swiss Army Knife can opener, so the hole I make is in the bottom of the can. All three pieces of wood are stood up and the tin can is put over the three pieces. Spread the pieces of wood until the tripod is balanced and feels solid.
Thread a length of cord through the hole from the top and tie a simple clove-hitch knot on a small, stout stick. The top will catch on the tin can and hold in place. A larger stick on the bottom can be longer and fit through the bale of the kettle or pot for a secure fit.
Adjust the tripod by spreading the legs apart to bring kettle closer to the flame, or push the legs closer together for a higher setting.
SUPER CAT STOVE
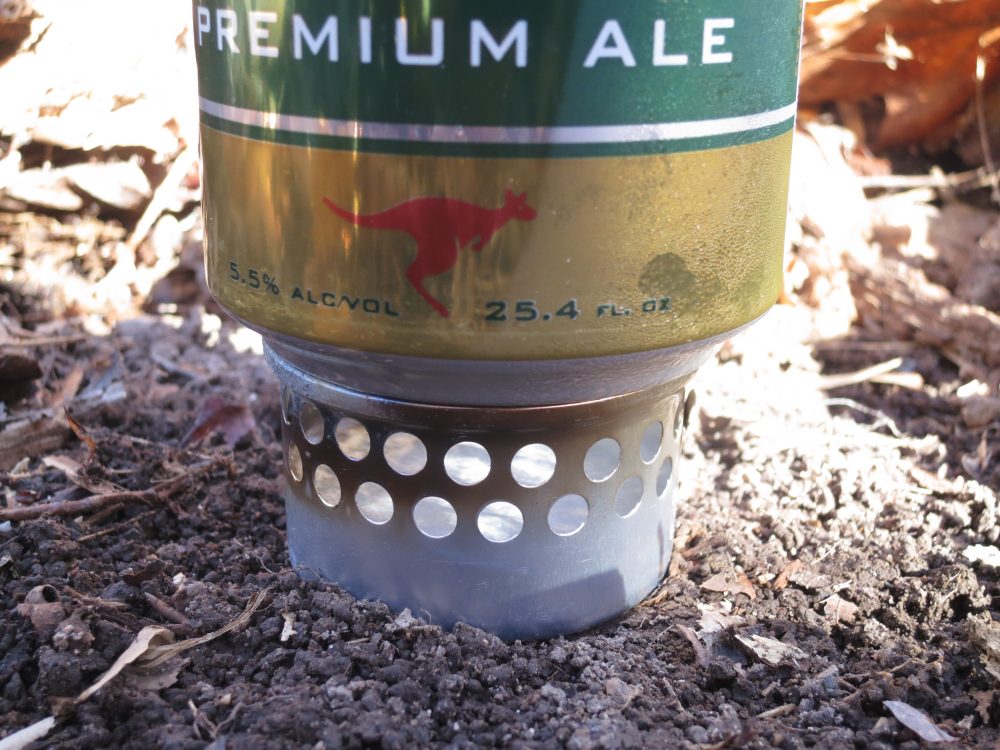
Called a Super Cat because they are usually made from a Fancy Feast cat-food can, small alcohol stoves can also be easily made from a Vienna sausage can or any three-ounce aluminum can. Backpackers and preppers have been using these types of alcohol stoves for years. They run on denatured alcohol, HEET, rubbing alcohol, Everclear, or ethanol as fuel.
Most pressurized stoves require multiple components that must be taped, epoxied or welded together in order to create their pressure chambers.
The Super Cat’s pressure chamber, on the other hand, is created simply by placing a pot on top of the stove, thereby blocking the expanding gas from escaping through the top and forcing the flames out through the side vents. The Super Cat design is also simpler than most because it doesn’t require the use of a separate pot stand. The stove itself serves as both the burner element and the stand, since the pot is placed directly over the top of the stove.
Once the can is empty, use a regular paper hole punch to make two layers of holes around the circumference of the can (about 16 holes). Fill the can with the desired fuel up to the holes. This will equal one to 1.5 ounces of fuel. Ignite it with a match, lighter, or spark from a ferrocerium rod.
The fuel burns out clean and dry, with no residue to clean. Pick up the can and throw it back into your pack after it cools down. In addition to liquid fuel, the Super Cat accommodates solid fuels like Esbit tablets, trioxane fuel bars, and packaged gel, which are good emergency fuel options.
Look around the forest or near dumpsters and rest assured, you will find survival gear for prepping and any emergency you may encounter. You just need an open mind, a few tools, and a lot of creativity.

