In the November issue, we covered simple shelters that can easily be located and utilized in various wilderness environments without tools or any actual building. In this article, I’ll cover shelters that can be constructed using common tools you may be carrying on your person during a hunt, fishing expedition, hike or while out shooting for the day.
These tools are usually small fixed blades and multi-tools. Fixed blades are commonly carried when you are out hunting or fishing. Although there is no real chopping power in a small fixed blade, there are ways to make a smaller blade perform big tasks.
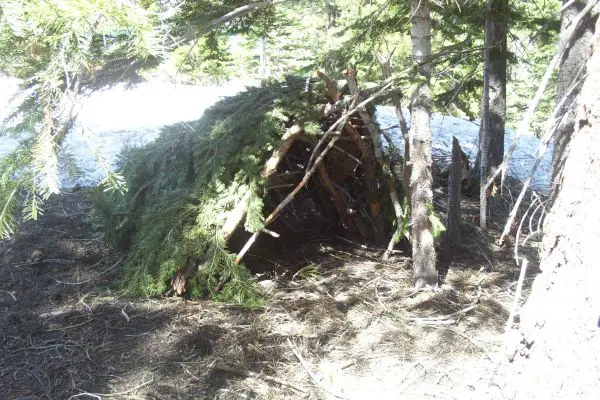
Frame debris hut made with the saw on a Swiss Army Knife. This was built in the winter in Mammoth Lakes, CA, on a survival trip. Ground area at base of tree is free of snow.
Table of Contents
WOODED FORESTS
A debris hut is easy to make but requires some work. Most of the construction can be done with your hands and a decent pair of gloves for protection against splinters and thorns. One tool that is very small and lightweight is a Swiss Army Knife. Many outdoorsmen consider a Swiss Army Knife standard gear. It has a wood saw that is perfect for cutting tree boughs in the construction of a debris hut.
Build the hut by placing one end of a long ridgepole on top of a sturdy base. Secure the ridgepole (pole running the length of the shelter) by anchoring it to a tree at about waist height. Prop large sticks along both sides of the ridgepole to create an “A” frame. Ensure the framework is wide enough to accommodate your body and steep enough to shed moisture.
Place finer sticks and brush crosswise on the framework. These form a latticework that will keep the insulating material (grass, pine needles, and leaves) from falling through the framework into the sleeping area. Add lightweight dry, soft debris over the framework until the insulating material is at least two feet thick—the thicker the better.
Situate a two-foot-thick layer of insulating material such as pine needles, dry leaves or grasses inside the shelter. At the entrance, pile insulating material that you can drag toward you once you’re inside the shelter to close the entrance. You can use a backpack if you have one.
Finally, add shingling material or branches on top of the debris layer to prevent the insulating material on top from blowing away in heavy winds.
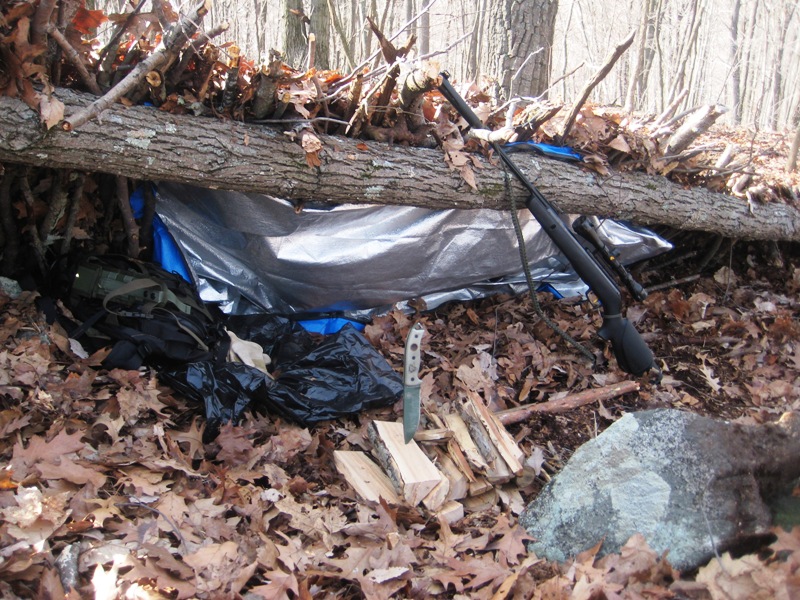
Debris hut built in Bethel, CT, by utilizing fallen tree and sticks found on forest floor. No tools were used in construction of this shelter. Poncho or space blanket can be used to further waterproof any shelter. Photo: Anthony Montero
DESERTS
The desert landscape is arid. Less water means less vegetation and overall growth. This makes locating shelter materials more difficult, but not impossible. Knowing what to look for is of the utmost importance.
First and foremost, get out of the sun. In the southwestern U.S., it is not uncommon for ambient temperatures during the day to reach over 115 degrees Fahrenheit, with ground temperatures soaring to 140 degrees or more. The sun will dehydrate and exhaust you, so let’s focus on shelters that offer the most shade with the least amount of work.
Juniper trees are common in southwestern deserts and offer a place of refuge from the heat. If you are near a stream or river, willow trees can be found and provide great shelter-building materials.
The bark from juniper trees is another option for use as both overhead thatching and ground insulation. If enough bark is gathered, it can make a lofty bed. When gathering shelter materials, watch out for snakes and scorpions, which may be hidden in dry grasses and rocky terrain.
Use any cutting tool, such as a saw from a multi-tool or Swiss Army Knife, to cut away branches from fallen or overgrown trees to clear an area you can comfortably spend the night in.
You can also make a desert debris hut similar to what you would in the forest, if materials are readily available. Dry grass makes good insulation against the heat and cold of the desert floor in the winter, when temperatures can drop to 32 degrees.
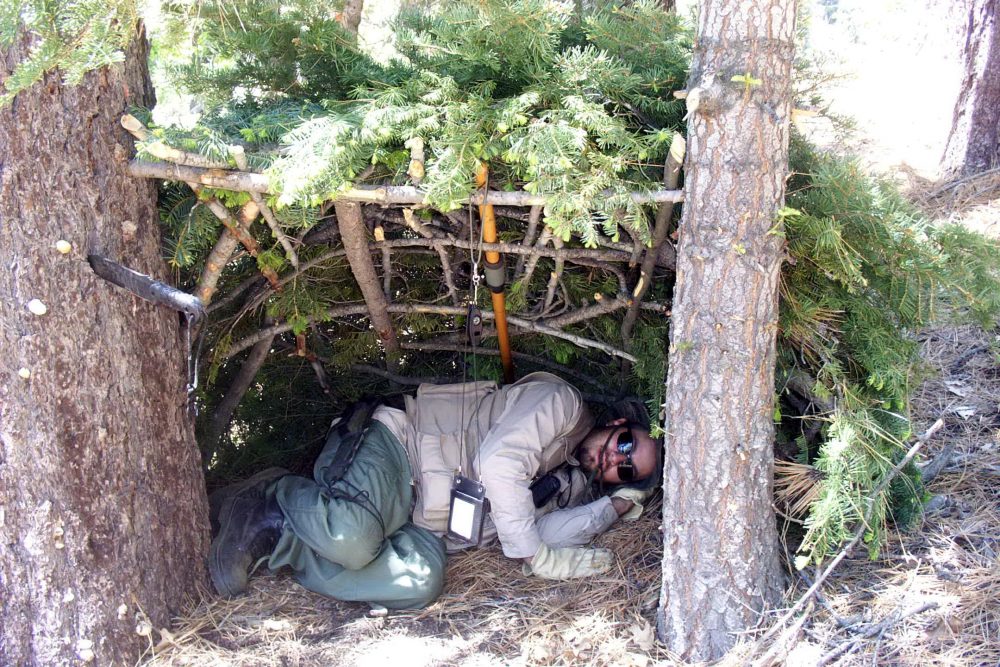
Simple lean-to shelter using one horizontal support pole wedged in between two trees and piling pine boughs and sticks as thatching. All construction was done with fixed-blade knife and leather gloves.
TROPICS
In the tropics, it can be hard to find natural shelters, but there is an abundance of material that can be used to construct a shelter.
Night falls quickly beneath the jungle canopy, and it is important to start building a shelter early. Having spent a few nights in the jungle myself, I cannot stress enough how important it is to sleep up off the forest floor away from ants and other insects.
Life in the jungle without a machete is pretty miserable, to say the least. If you happen to be hiking in the jungle with a machete, you can construct a pole bed. Making it correctly and safely can take anywhere from one to three hours.
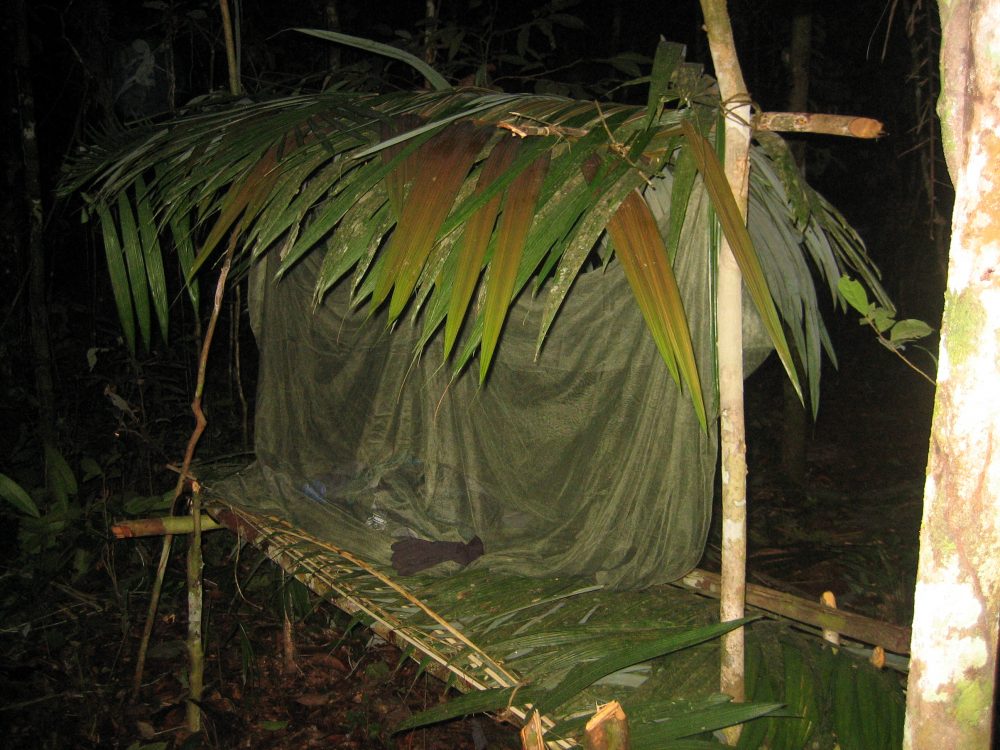
You need four Y-shaped trees for the foundation. Stick them in the ground about waist high and arrange them as four corners like bedposts, making sure to space them a little wider than shoulder width. Do not use dry, brittle wood, as it can crack or break when supporting your weight.
Next, cut two support poles that rest directly on the Y-shaped posts, one for the head end and one for the foot end. These serve as the support bars for the longer poles that run parallel to your body.
The last step in constructing the framework is to cut approximately six longer poles, each about six feet long. Lay them across the two support bars from head to foot. With the exception of the four Y-shaped posts, all you need to support your weight are wrist-thick saplings. Use palm branches and any type of leaves as your mattress. This is your bed.
Finally, lash a long, thin stick overhead from one end of the bed to the other. This acts as the support for the waterproof material you need to place above you. Palm fronds serve well as overhead protection against rain. They must be woven together and layered to be effective. A poncho is the easiest way to waterproof this type of shelter.
The dangers of constructing shelters in the tropics range from wasps, hornets, and bees to snakes and ants, any of which may be occupying the area where you wish to make your new “home.” In the jungle, I have seen people chop into branches and get attacked by irate hornets. I myself have made this mistake, chopping into a small sapling for shelter material without first looking up. I paid for this error with a shower of fire ants from a nest above. It only takes one such incident to make you aware of this danger. The same is true with snakes in trees. Always look up and give the tree a shake before attempting to cut it down.
Common pole-bed shelter for the tropics, where getting up off the ground is vital. This shelter was built in the Peruvian jungle using a machete.
SUMMARY
If you conclude that no natural shelter can be found and it is time to build one, you must consider the time, effort and availability of the tools and materials needed to properly construct a shelter.
Survival expert John “Lofty” Wiseman teaches that when constructing a shelter, it is important to build it right the first time. What seems like a shortcut may ultimately take more time in the long run, so do it right the first time. Your life may depend on it!
