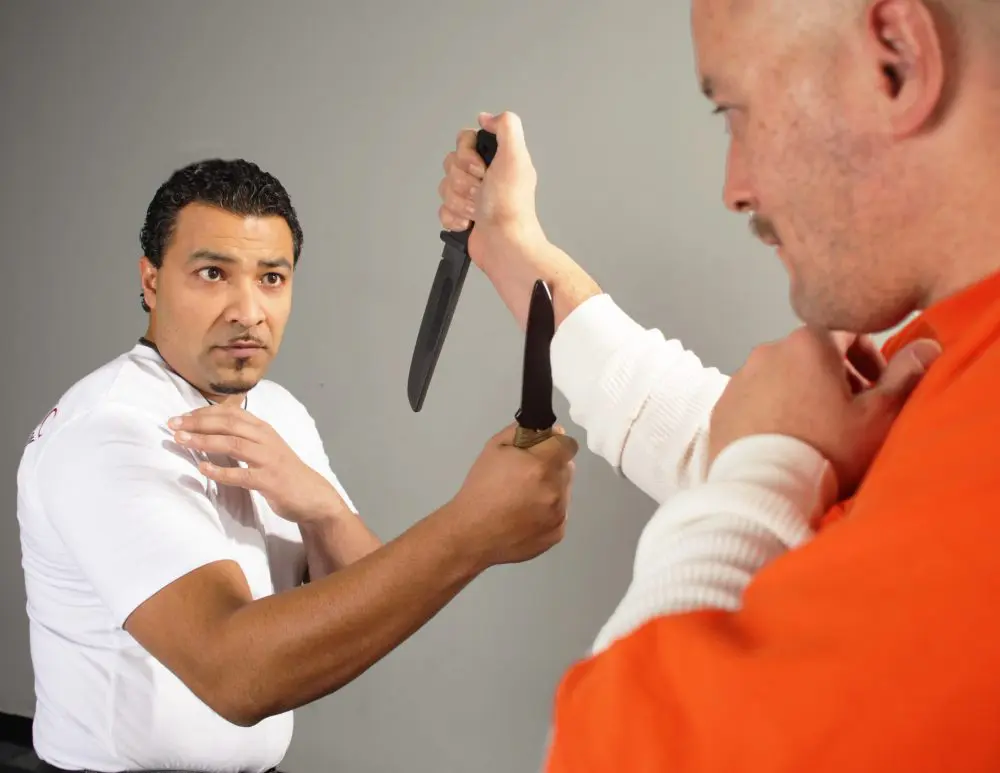
It’s 10:00pm and you’re walking to your car after work through a dark and desolate parking lot. You’ve done this same walk thousands of times, but something seems a little off tonight. As you approach your vehicle, you notice two males striding quickly toward you. Only a few feet away, you see the unmistakable glint of a stabbing weapon.
What do you do?
This is a common occurrence for thousands of good citizens every year, and yet only a small percentage will ever be proactive in learning more about it. After a three-year independent study of knife attacks—specifically in Department of Corrections due to their “shank” culture—I began to recognize particular commonalities. Understanding these characteristics is the first line of defense in prevention.
In this article, we will discover several aspects of the edged weapon to help you understand the intricacies of the blade. Our objective isn’t to turn anyone into an edged weapons warrior, but to give an inside look at edged weapons handling. Like any other weapon, edged weapons require close attention, training and understanding.
Table of Contents
ANATOMY OF A KNIFE ATTACK
The first aspect of the knife attack to understand is that, in order to be dangerous, the knife must be close. It is very difficult to harm someone with a blade from 10 to 12 feet away, although that distance can be rapidly covered. Based on that, it is safe to say that it is imperative to recognize anyone within that range, and to always scan their hands for a weapon.

The second key is reading the telltale signs. Typical suspicious behavior includes a rapid walk, repetitive shifting of weight from front foot to back foot, constant scanning of the area, plucking of the shirt to hide any weapon, a verbal playlist that repeats phrases such as, “Hey man, you got the time?” one arm tucked tightly to the body during the approach, and finally what I call the “six-foot rule.” This refers to the average distance from the target at which the attacker “chambers” his arm to initiate the attack.
Based on these fundamentals, the best option for prevention or survival is to keep any unknown or suspicious characters at least six feet away from you. If you cannot do so, then you must be cognitively aware of anyone within that distance and train the eye to see the listed behaviors. Only then will you be able to effectively deal with a knife attack. Whether you decide to evade, engage with a weapon of your own, or even attempt to disarm, time and distance are key!
USING A KNIFE TO DEFEND YOURSELF
Using a knife or any other edged weapon seems simple enough, “pointy end in other guy,” right? Wrong! There is a science to knife fighting, and it takes time and practice to become proficient. Distancing is a key element in edged weapons.
Unlike a firearm, which is just as dangerous at distance as it is close up, the edged weapon must be close to the opponent to be useful. Attributes typically related to hand-to-hand combat, such as timing, distancing, and line familiarization, take effect but with greater importance. Improper training is usually worse than not having any weapon at all. Here I will help you understand one particular concept of edged weapons that very few people know and even fewer will tell you.

BODY POSITION
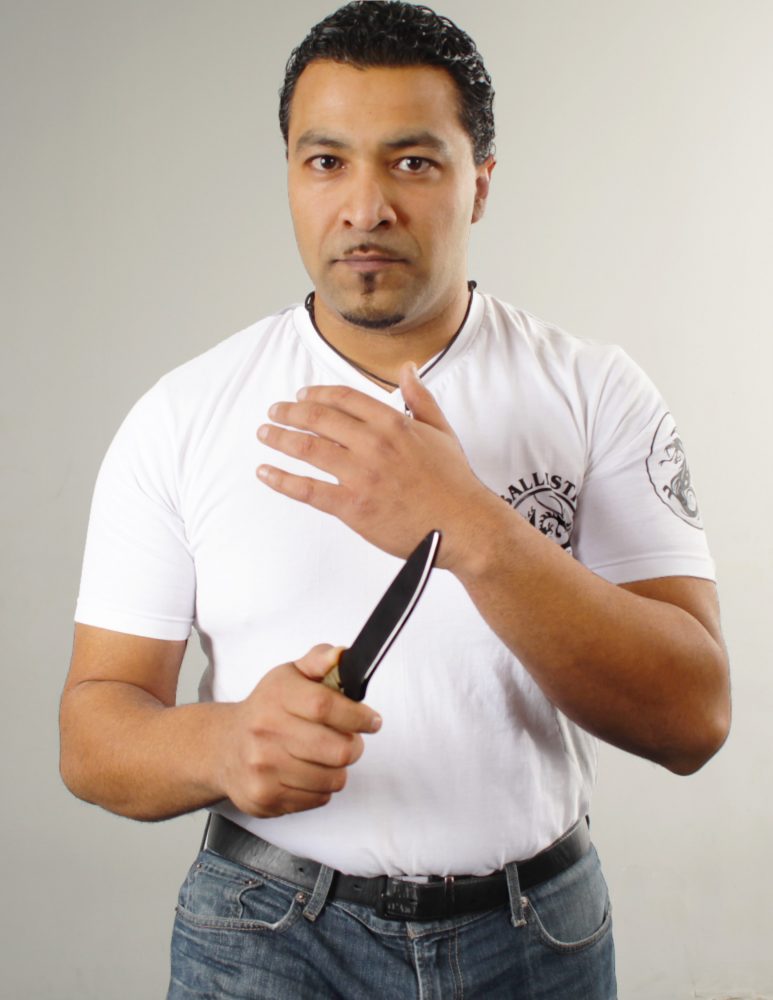
Body positioning is a critical element in edged weapons tactics. Our objectives are to be athletically mobile, efficient, offensive and defensive at the same time. Note from the photos that I have placed my elbows in tight to my body to protect my lungs and abdomen. My unarmed hand is behind the knife and high to protect my heart and throat. The edge of the blade is in line with the center of my body to prevent manipulations of my arm or attempts at a takedown. Keeping your body structure compact is 50% of the game! Don’t take this lightly.
GRIP METHODS
Understanding grip methods and their purposes is a critical element in understanding and formulating your game plan with edged weapons. Each method has its particular purpose, and using the wrong method for the wrong purpose is similar to using a hammer to paint a wall.
Standard
The Standard Grip is the most natural and versatile grip of the three: edged side down, blade pointed directly outward, and the butt of the knife close to your body. This method is considered defensive and is now the preferred method we teach to special forces. The Standard Grip allows you to maintain distance, and slice and thrust the blade, giving you the widest area of coverage. But this method is not the best way to break through a solid target such as the breastplate.
Reverse Out
I jokingly call this grip method the “Chucky Doll Grip,” as it reminds me of old slasher horror movies. The blade is perpendicular to the ground, with the blade facing outward and the thumb capping the butt of the knife.
The Reverse-Out Grip is used as an offensive method, but requires closer proximity. Not only is it limited to close range, but slicing or slashing is very difficult. On the other hand, this method is excellent for hacking through hard targets.
Reverse In
The Reverse-In Grip was the preferred method of our special operations military groups for awhile, but has been replaced by the Standard Grip. Held almost identically to the Reverse-Out method, the only difference is that the blade is facing toward the forearm. Slicing and slashing are totally out, but you achieve the ability to hack through hard targets and follow up with a downward tearing motion.
Attacker has made a forehand strike. Author responds by cutting the wrist and stepping back.
PUT IT TO WORK
Now that we know the grip methods and their uses, it should be evident that in a typical self-defense situation, we prefer the Standard Grip. It gives us the most distance, widest area of coverage, and highest number of techniques.
So what is this “secret” concept that very few people know? To find the answer, we study the tactics of the Filipino martial arts. No other culture in history has developed the use of the blade like the Filipino. The concept is called “De-Fang The Snake” (DFTS). Here’s how it works.
We should all realize that knife fighting is not like what we see in Hollywood movies, and is always dangerous. But if you must be involved, have a game plan.
At engagement, we want to be at “full step” distance, meaning that to be able to make contact with our opponent—or vice versa—one of us would have to take one full step. Standing closer means we can strike, stab, and slice, but they can do the same to us. Open up the distance right away!
Attacker has made a backhand strike. Author cuts the outside forearm and steps back.
Second, we don’t look at the body as a primary target. Instead we look at the most exposed limb, which will normally be the arm that extends to us. Using DFTS means we want to cut the hand and step backward simultaneously to maintain distance. Making a clean and unexpected cut to the hand, wrist, forearm or elbow typically results in an instant disarm, temporary systemic shock, heavy bleeding, and sometimes sudden loss of consciousness.
These are rarely fatal wounds—which is exactly what we want. No need to explain to the jury why someone who attacked you died from multiple stab wounds. Self-defense or not, it is always important to act within the laws and with an ethical code.
If you can picture the scenario, you’ll see how maintaining distance has kept your vital targets out of harm’s way, along with forcing the attacker to extend out to you, thus exposing his arm as a target. Attacking the arm is the fastest solution for disarming and ultimately ending the altercation as quickly as possible. Keep the footwork moving, pay attention to the distance, and attack whatever limb the attacker lunges toward you with.
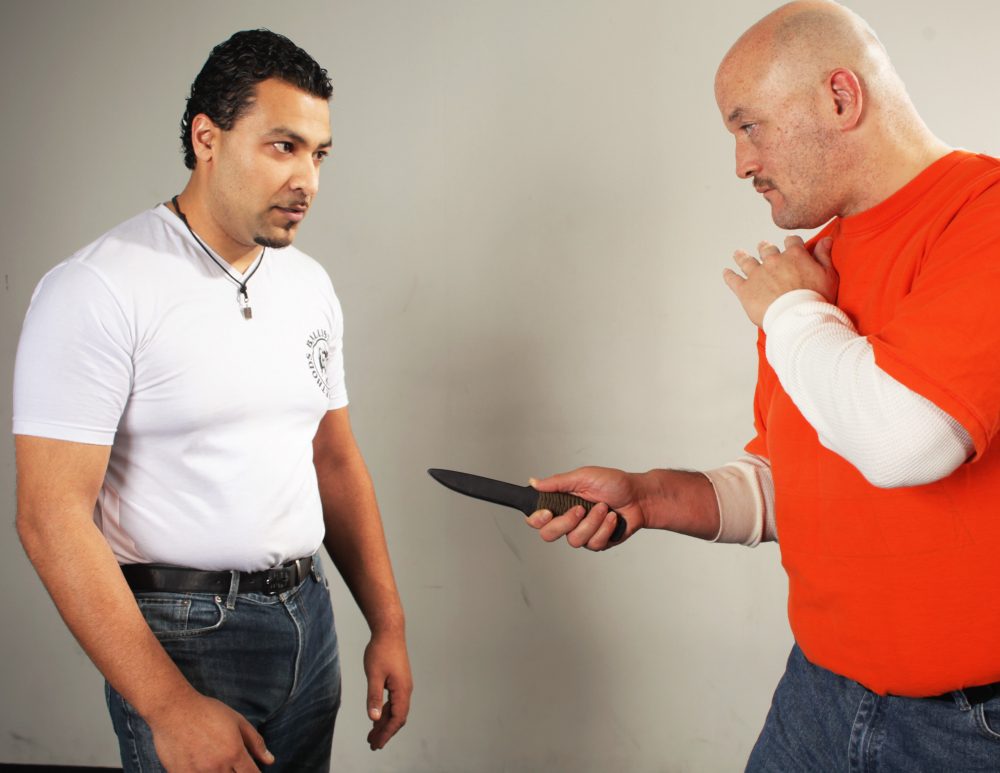
Attacker brandishes a weapon and thrusts it toward the abdomen…
DISARMING A KNIFE
Facing a blade-wielding criminal when you are unarmed is an unpleasant situation, to say the least. You might face this yourself one day, so knowing how to handle it is critical.
First and foremost, let it be known that 90% of the time when a weapon is presented in a street crime, it is used as a tool of intimidation. The attacker will brandish the weapon and then make demands. If he tells you to give him your wallet, watch, shoes—do just that.
If you feel there is a viable threat of grievous bodily harm, engage as quickly and concisely as possible. Also understand that you should never “chase” disarms. That is a sure way to get yourself in big trouble. Let me give you a better understanding of what it takes to functionally disarm an edged weapon.
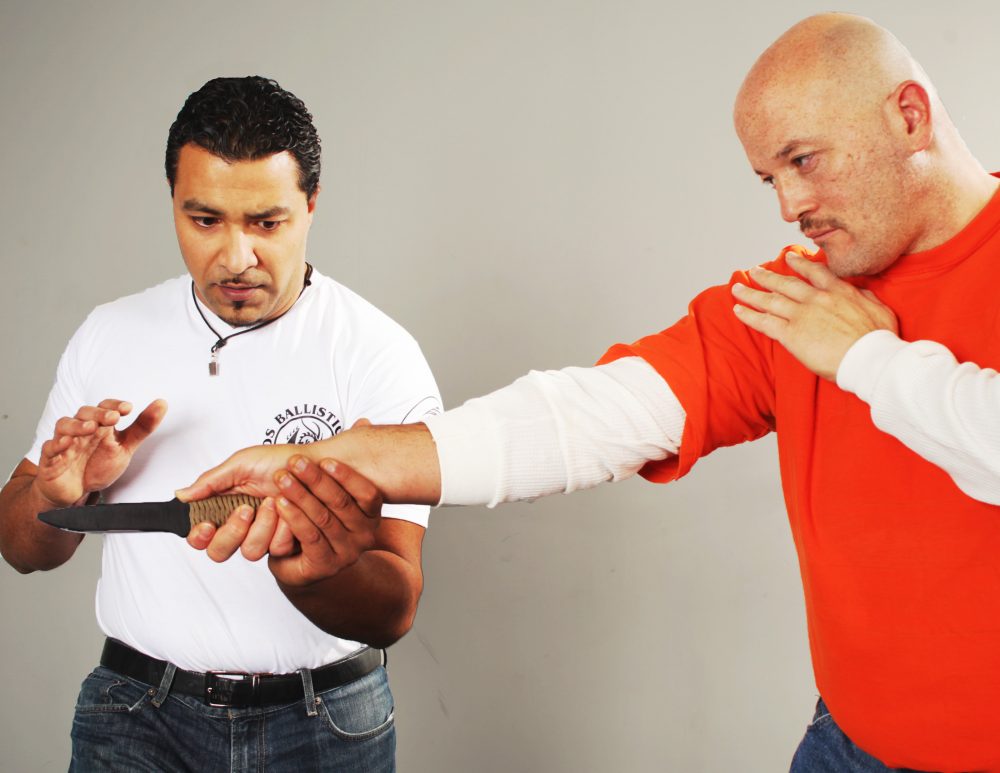
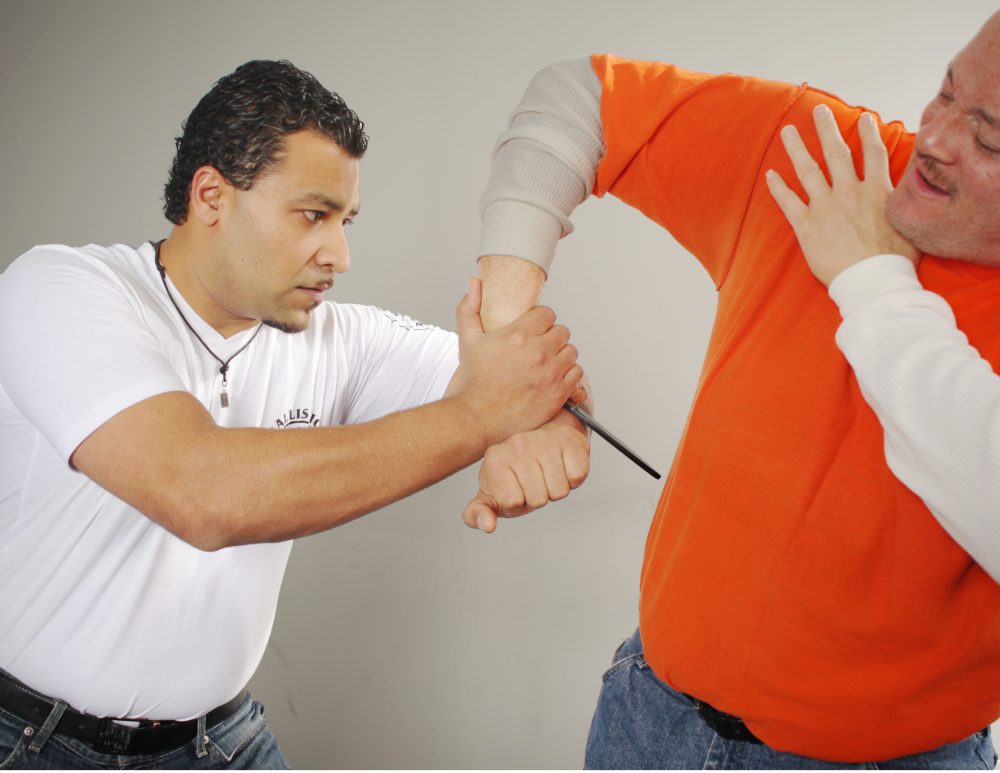
The first two components to a disarm are repositioning your body and making cohesive contact with the extended arm. You may have to apply some footwork to evade the initial attack, or you might simply have to rotate your torso. Regardless, it must result in a position in which you are clear of the blade and have positive contact with the arm holding the knife.
Cohesive contact means you’ve made contact with the armed hand to locate it and keep it from harming you. How you’ve made the contact will influence what your following response will be. Throw the old karate roof block out the window—it will get you cut instantly!
…author steps to the outside and makes cohesive contact under the attacker’s wrist…
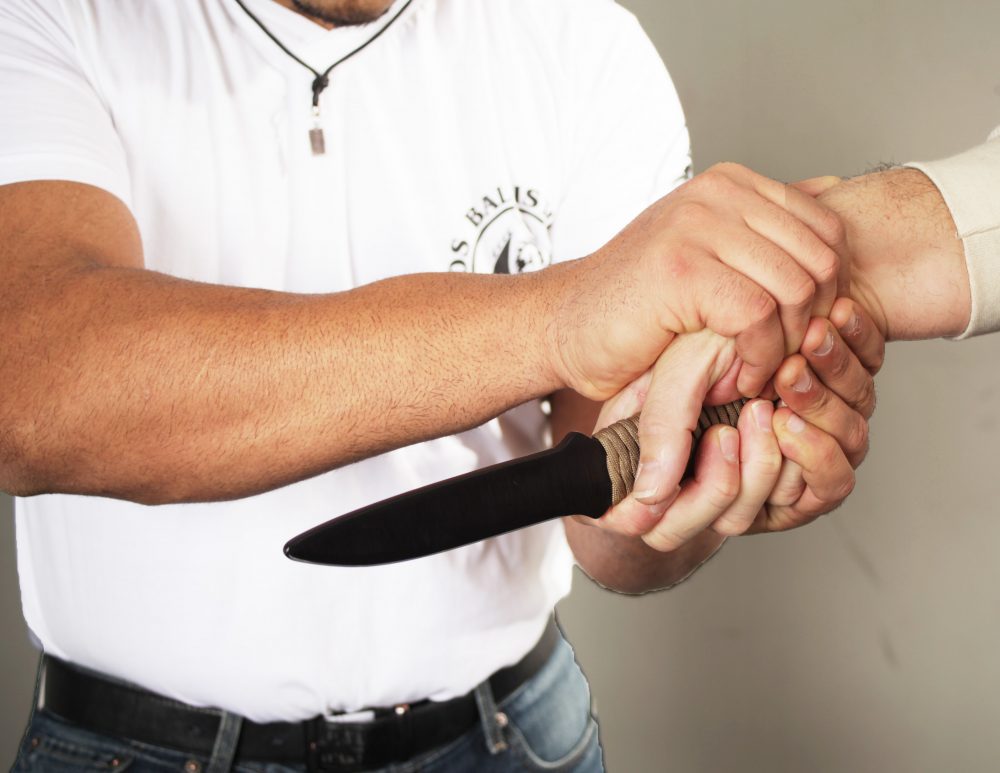
The next part to applying any disarm is to engage the “controlling” hand, the hand allowing for the leverage needed to control, manipulate or disarm. This method is commonly referred as Two-On-One control and is a useful tactic because, regardless of size, strength, speed, height or weight, you will have maximum potential control over the attacker’s arm if you commit your full grip and isolate his arm.
The goal is to minimize his movement and aggressive behavior. As expected, he will attempt to free his arm by pulling back. Instead of having a tug of war, follow his force and maintain control.
Now is the time to go on the offensive. While the instinct will be to attempt an immediate disarm, realize a couple of things. First, he has another arm to strike with. Second, any disarm is easier after you inflict some pain. Attacks to the groin or knees can be very useful.
…then places his controlling hand over the thumb and secures the attacker’s wrist.
Should you choose to skip the striking portion, manipulate the arm or wrist in a way that is not only quick but also gives you protection from the attacker’s free arm. Disarms require opposing forces. One of those forces is on the side or spine of the actual blade. The second force is at the wrist, thumb, pinky finger, or elbow. These are the areas that control the grip of the knife, and you need to attack it.
Depending on the alignment of your structure, decide which target is best. This is very much a “feel” thing and requires training and practice.
In the photos, I display a couple different disarm methods. Each was based on my hand configuration in the Two-On-One. If possible, you may want to apply a “Return To Sender,” redirecting the blade back to the aggressor. The opposing forces here are at the wrist and the side of the blade using my forearm. This causes a gooseneck at the wrist and elbow. It doesn’t take much force or strength but does require training to do properly.
Author applies “Return to Sender,” in which blade is redirected to the attacker with a wrist manipulation and assisted with his forearm.
CONCLUSIONS
Disarming a knife is a complex and dangerous process. It definitely isn’t like it’s depicted in the movies. While every scenario presents different challenges and responses, the fundamentals of knife disarms remain consistent.
Strong fundamentals and practice are the only ways to truly learn the applications. My intentions here were to give a better understanding of the fundamentals and to encourage those so inclined to get training in self-defense with edged weapons.
The knife is a reliable tool with great merit. Its compact design, easy concealment, and legal tolerance make an edged weapon a great choice for self-defense!
Nik Farooqui is the founder and chief instructor of Ballistic Fighting Methods and StreetSafe101. He is respected as an expert in hand-to-hand combat and edged weapons, and travels the country teaching seminars to civilians, corporate groups, and law enforcement. For more information, visit www.streetsafe101.com.
