Aboriginal opportunistic methods of shelter are worth knowing in advance of a survival scenario. When things have not been going your way, you may have to, like Teddy Roosevelt advised, “do what you can, with what you have, where you are.” Even taking advantage of existing shelter like the protection of spreading trees or natural caves might make the difference, but you can do a lot better.
Depending on your location, you will need shelter to keep warm, keep cool or block the damaging radiation and blinding light of the sun. In some venues, all three can become important at different times of day. Once fire became man’s ally, it greatly enhanced keeping warm.
When improvised Paleolithic stone implements became part of our tool kit, they opened new possibilities for local materials in quickly improvised or even permanent shelter. Protection from heat is largely a matter of staying hydrated and avoiding direct sun. In most regions, keeping warm is the consideration.
We’ll use the “fell naked from a plane” scenario and assume that what you have to work with for shelter is what nature provides and what you brought between your ears.
If you happen to have a knife, a Bic to flick, good boots, canteen, poncho or space blanket, you can consider yourself a “tourist” and not a “survivor.” And if you have a friend to share the experience, that’s good news, too—it means that at worst only one of you will starve to death.
EMERGENCY SHELTER
“Emergency” implies you need shelter quickly and you don’t have much to work with. Even burrowing into the snow greatly increases your odds of survival. Digging a cave in a snow bank under solid snow is even better.
Get out of the wind. If you’re in the woods and dark is upon you, a deer bed of moss, leaves, ferns, grasses or evergreen boughs that has enough similar material piled above it to let you crawl into it will go a long way
to keep you from dying of hypothermia before daylight. Even if you are wet, keeping the wind off may by itself save you from hypothermia.
Ignore stickers and bugs—they come with the territory. If you have an hour or so of daylight to prepare shelter in the woods, you may have time to get comfortable.
The next level beyond a quick deer bed is the Huck Finn or Robinson Crusoe style hut. What you do will be a balance between what there is to work with and what you need to prepare for. Like these fictional characters, take stock of what you have, and while you are doing that, get busy hoarding what will be useful.
Start with material for a deer bed as above, in case you get interrupted or lose light, and go on from there. Dry is always better, even crucial
except in the tropics, because of water’s heat-robbing ability. Your body heat will often dry clothing, but not if you continually get re-wetted. Hoping to use body heat to dry all the water that might come your way when you are unprotected is only possible if you never stop moving. You may not have the calories to waste, and you must rest. Thus, a roof and windbreak are important. Build shelter out of the wind, where no water can run in.
Green evergreen boughs and leafy hardwood limbs that can be hand-broken and are suitable for weaving or layering will probably be the most expeditious. A large log, sturdy low branch a few feet off the ground, or a fallen tree make good foundations to build on. Don’t make it too steep, as gravity will play a big part in keeping your shelter together, although the steeper it is, everything else being equal, the better it will shed water.
As long as the basic structure is strong enough, there is no such thing as too much thatch—you want to be as dry and warm as possible. A good starting point are large evergreen trees that have substantial limbs close to the ground. With nothing to build on, three forked sticks stacked in a tripod (and more, stacked in a circle) make a good foundation. Start with three and lean more in a circle, just like stacking rifles in the Army.
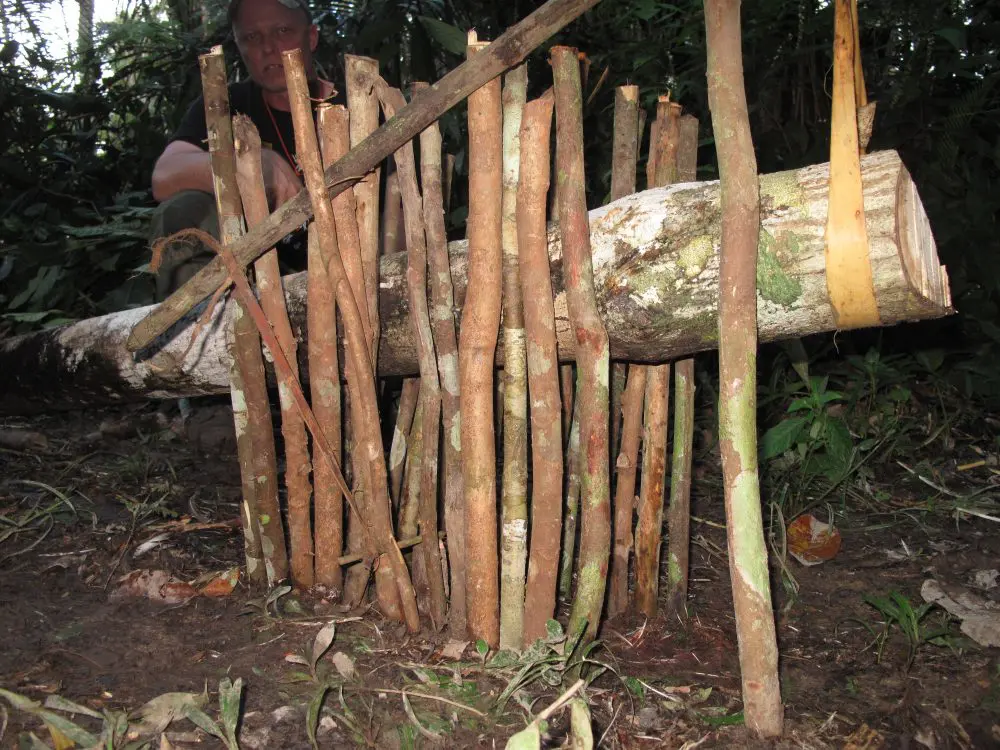
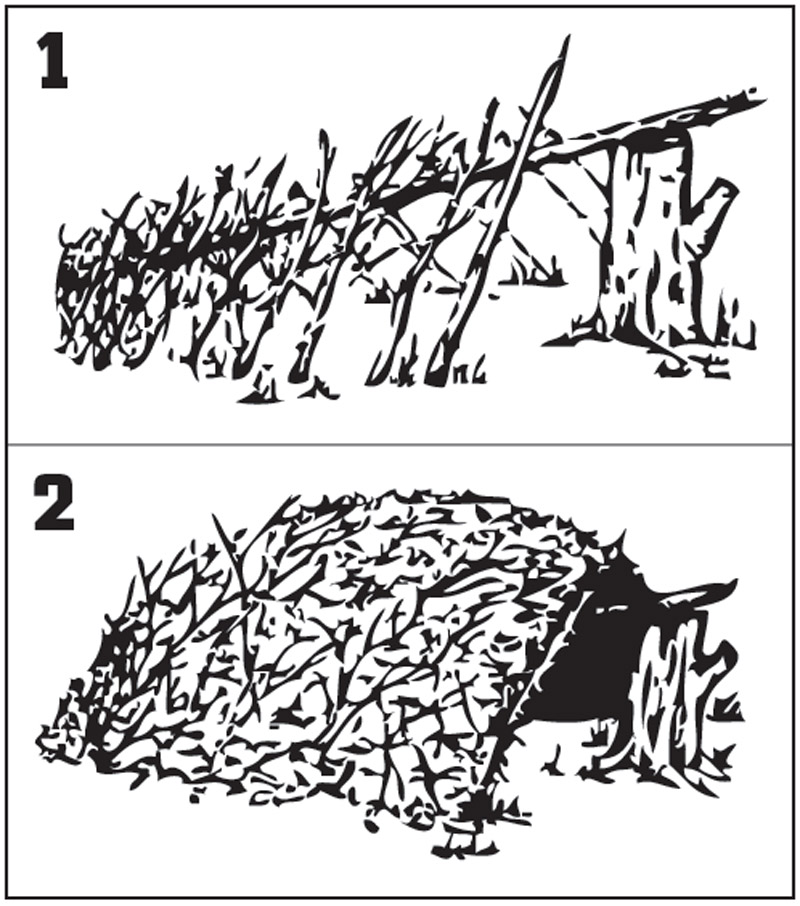
One of the fastest, snuggest quickie shelters I ever threw together was simply a row of down and dead poles leaned on a three-foot rotten fir log. Slabs of rotten but thick bark from elsewhere on the log were overlain on the poles, and the whole thing thickly thatched in with sheets of duff from the forest floor. It went together snug-as-a-rug in a flash, leaving plenty of time to gather more than enough bedding and even scrounge up a woods-vegan meal before dark. Woods shelters are easy, as long as you have woods.
If you don’t have a fat old log or dirt bank (not along a watercourse) to lean on, you have to make a stand-alone with vertical “bones,” either starting with a tripod as above, or by pushing sticks in the ground and intertwining the tops. Next, weave evergreen boughs or green hardwood limbs through these horizontally, in effect building an inverted basket. Leave an entrance, but no bigger than you need.
Once completed, you have a basic windbreak, but you want it dry. This kind of shelter is not waterproof, but the right thatch overlay can turn the water, encouraging it to run down, not drip on you. A thick layer of evergreen boughs, stem up, woven into the “basket” starting at the bottom and working toward the top, works surprisingly well. Large handfuls of grass or reeds, woven in vertically in overlapping layers from the bottom up, are what have kept European thatch houses bone dry for centuries.
Assuming the structure you built is strong enough, the more you add, the better it will be. Sliding both your forearms under large swatches of duff from the forest floor will get “tiles” of leaves or needles to overlay your wee hut. Bark from dead trees, especially large rotten evergreen logs, can often be removed in newspaper-sized pieces to make excellent “sheet goods” for constructing or covering. With or without hope of a warming fire, a thick blanket in a simple square-weave pattern of ferns or fine evergreen boughs will make a big difference. A door can be built in the same way, just smaller and heavier.
THE WISDOM OF THE WIKIUP
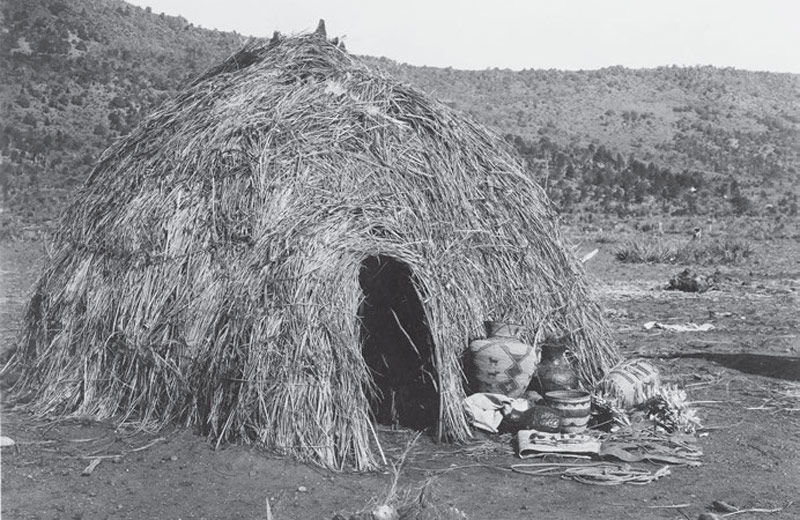
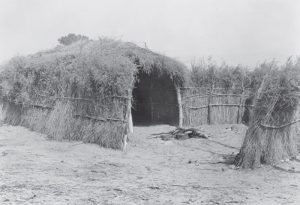
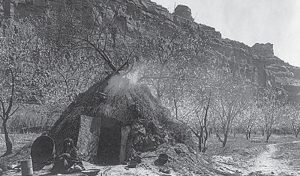
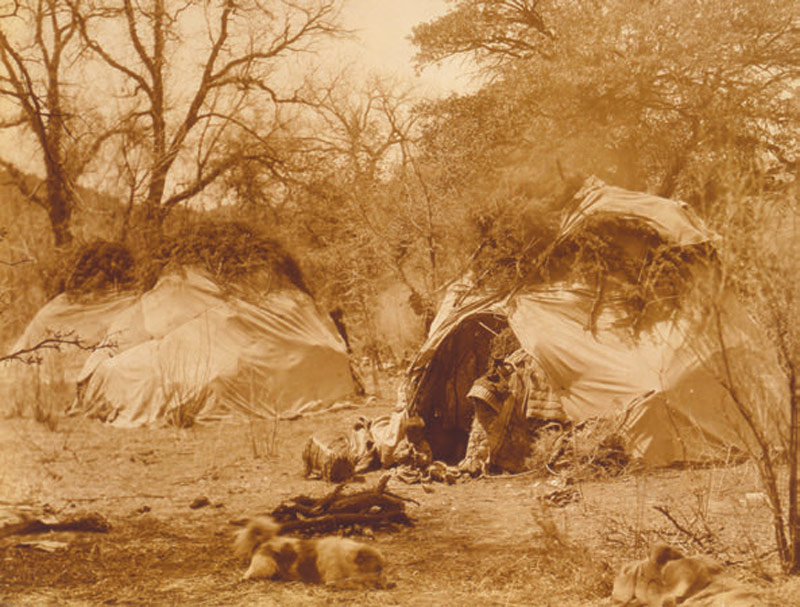
A seasonal or temporary native shelter we can easily mimic is the wikiup, built with a framework as described above but larger and covered with woven brush, reeds, grass or other local material.
The next step up is the wigwam, halfway between a wikiup and a tepee, with an ad-hoc framework but covered with reusable mats or skins. The final evolution is the tepee, with reusable mats or hides as cover, but built on a conical circle of tall poles designed to knock down and move for reuse.
With materials at hand, a crude wikiup is fast and serves our purpose for short-term shelter—and lends itself to the modular approach if you want to continually upgrade for a longer stay.
Flat or angular stones make excellent fast components for a hasty shelter, because with a little stone stem-wall, it’s just a matter of dimension between an ad-hoc sleeping-bag-sized hut and a solid base for a wikiup or basic hogan. Natives in the Southwest built hoganstyle shelters with only the most basic Neolithic tools, from adobe, earth, timber, cactus ribs, twigs, brush, reeds and stone. Where good stone was available, structures that still stand were built. Hogan building has not been completely abandoned, even today. They are warm, cool, and doable with what is at hand, by hand.
A classic Navajo hogan is adapted to the setting. Digging down gives a head start on building up, so most start with an excavation, situated where water will not run in. They have thick, tapered walls built from a combination of earth, stone and adobe, architecturally similar to the earth-sheltered houses of premedieval Europe. They usually have a domed roof built of like materials on a framework of timbers.
Shelters of the quick genre are not rocket science. Building is intuitive, but does take common sense. Native Americans and aboriginal people everywhere survived and often thrived because of their wealth of common sense and backbone. If blessed with these same qualities, people in any situation can do the same.
